Installation
To setup the Hexadash in local environment, follow below-mentioned steps:
Install Prerequisites
Make sure to have all above prerequisites installed & running on your computer.
Prerequisites
Laravel has a set of requirements in order to run smoothly in specific environment. Please see requirements section in Laravel documentation.
Please follow below steps to install and setup all prerequisites:
After you finished with the above steps, you can run the following commands to run the Laravel Admin Dashboard in local environment:
| Command | Description |
|---|---|
composer install |
command to install all of the framework's dependencies. |
.env |
The root directory of your application will contain an
.env.example file. You should copy the file manually and rename
it to .env or run command cp .env.example .env
|
|
Please run the below command to generate the new key. php artisan key:generate
|
|
|
Please fill your DB credentials in the .env file.
DB_CONNECTION=mysql
DB_HOST=127.0.0.1 DB_PORT=3306 DB_DATABASE=hexadash_laravel DB_USERNAME=root DB_PASSWORD= |
|
php artisan migrate
|
This will migrate the database tables. For more details visit https://laravel.com/docs/9.x/migrations |
Xampp Start
|
Xampp start the connection of mysql database. |
php artisan serve
|
Navigate to generated server url http://127.0.0.1:8000 |
Webpack Setup
Follow these steps to set up Webpack for your project:
- Open the terminal in the root folder of your project.
- Install NPM Packages by running:
npm installTo run Webpack for development:
npm run watchTo run Webpack for production:
npm run prodTemplate Adjustment
Follow these steps to adjust your templates for development and production:
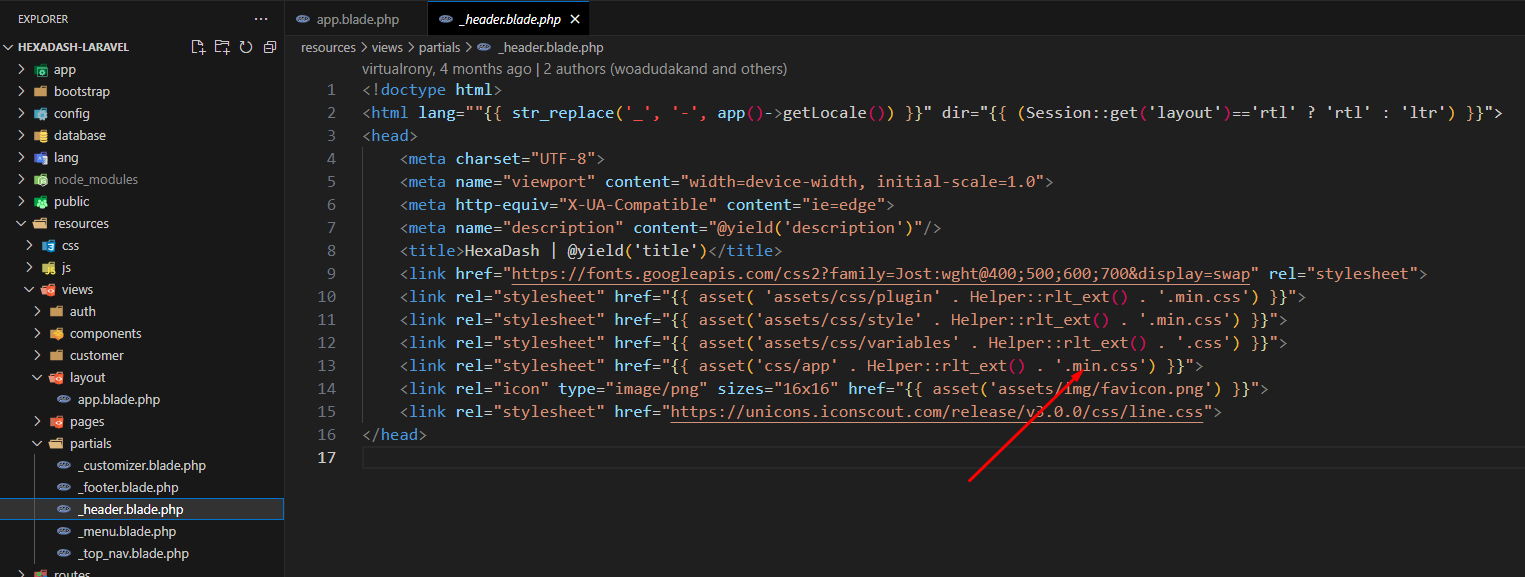
Step 1: Remove .min extension from css/app file during development and add it again when in production.
Path: resources/views/partials/_header.blade.php
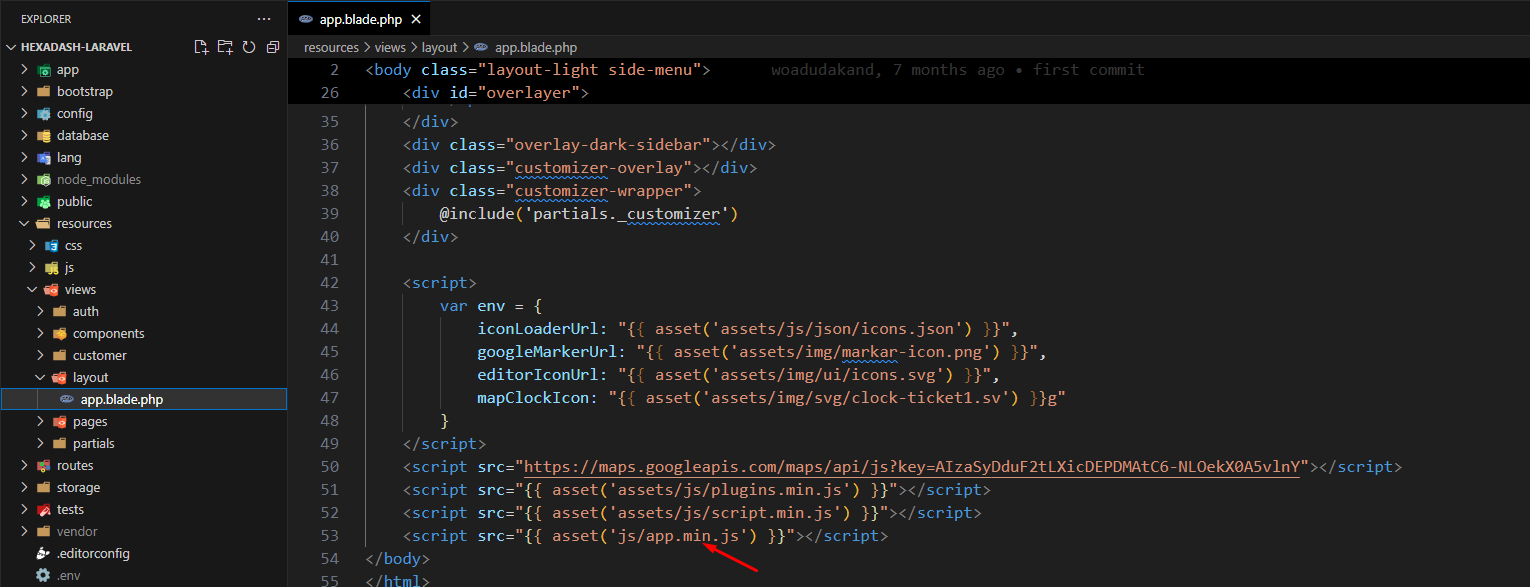
Step 2: Remove .min extension from js/app file during development and add it again when in production.
Path: resources/views/layout/app.blade.php